
If you’re trying to make paneer at home, the first question that pops up usually goes something like: how much milk do you actually need? The answer’s surprisingly simple but also depends on the kind of milk you use and how much paneer you want as your end result.
On average, you’ll get about 200 grams (that’s roughly a cup) of paneer from one liter of full-fat cow’s milk. That means if you plan on cooking a family-sized curry, you might need to pull out two or even three liters. Lower fat milk usually gives you much less—sometimes only half as much.
Most people don’t realize paneer yield can change a lot depending on the freshness of your milk, how long you let it boil, and even the acid (lemon juice or vinegar) you use to separate the curds. So, a tried-and-tested method really matters.
- Understanding the Milk-to-Paneer Ratio
- Factors That Affect Paneer Yield
- Choosing the Right Milk for Best Results
- Common Mistakes to Avoid
- Tips for Getting More Paneer Per Batch
Understanding the Milk-to-Paneer Ratio
The biggest thing to wrap your head around is that you never get a pound of paneer from a pound of milk. It’s always less, and the type of milk you use really changes how much cheese ends up in your colander.
On average, one liter of full-cream milk gives you about 180 to 220 grams of fresh paneer. That’s about 18% to 22% yield, which is pretty decent by home kitchen standards. Most people use two liters of milk at a time, which will give you enough paneer for a big family dinner—think four to five servings.
It’s kind of wild to see the numbers, so here’s a quick chart that makes it super clear:
| Milk Used (Liters) | Expected Paneer Yield (grams) |
|---|---|
| 1 | 180–220 |
| 2 | 360–440 |
| 3 | 540–660 |
Now, if you use skim milk or toned milk, the yield drops even lower—sometimes you barely get half what you would from full-cream stuff. That’s because a lot of the solid stuff that becomes paneer (fats and proteins) isn’t there in the skim version.
Here’s what really affects your milk to paneer ratio:
- Milk Fat Content: The higher the fat, the more paneer you get, and the creamier it’ll taste.
- Freshness of Milk: Ultra-fresh milk works best, since older milk separates less cleanly.
- Coagulating Agent: You’ll get slightly more paneer using vinegar instead of lemon, but it can affect the flavor.
If you’re aiming for fluffy, good-tasting paneer with recipes you actually enjoy eating, always pick whole milk or full-cream. That way, you don’t end up shocked by how little cheese your pot of milk turns into.
Factors That Affect Paneer Yield
Getting the most out of your homemade paneer isn’t just about the right milk-to-paneer ratio—it comes down to a mix of choices and steps. Using milk to paneer ratio as your base, here’s what actually makes or breaks how much cheese you end up with:
- Milk Type: Full-fat cow's milk always wins for quantity and softness. Skimmed milk can leave you wondering where your cheese disappeared to. Buffalo milk? The yield is even higher, plus the paneer comes out firmer.
- Freshness: Fresh milk curdles better. UHT or long-life milk barely produces any real curds, and you might be stuck with a disappointing, crumbly mess.
- Acid Choice: Lemon juice, vinegar, or even yogurt can be used. Vinegar works fastest, but you might get a slightly tangier taste. Lemon juice gives a more classic, subtle flavor. Yogurt makes the texture softer, but sometimes with a bit less yield.
- Temperature: Milk should be just at the boiling point—not a mad rolling boil, but definitely steamy and hot. Too cold, and the milk won’t separate. Too hot, and you’ll get tough paneer that breaks easily.
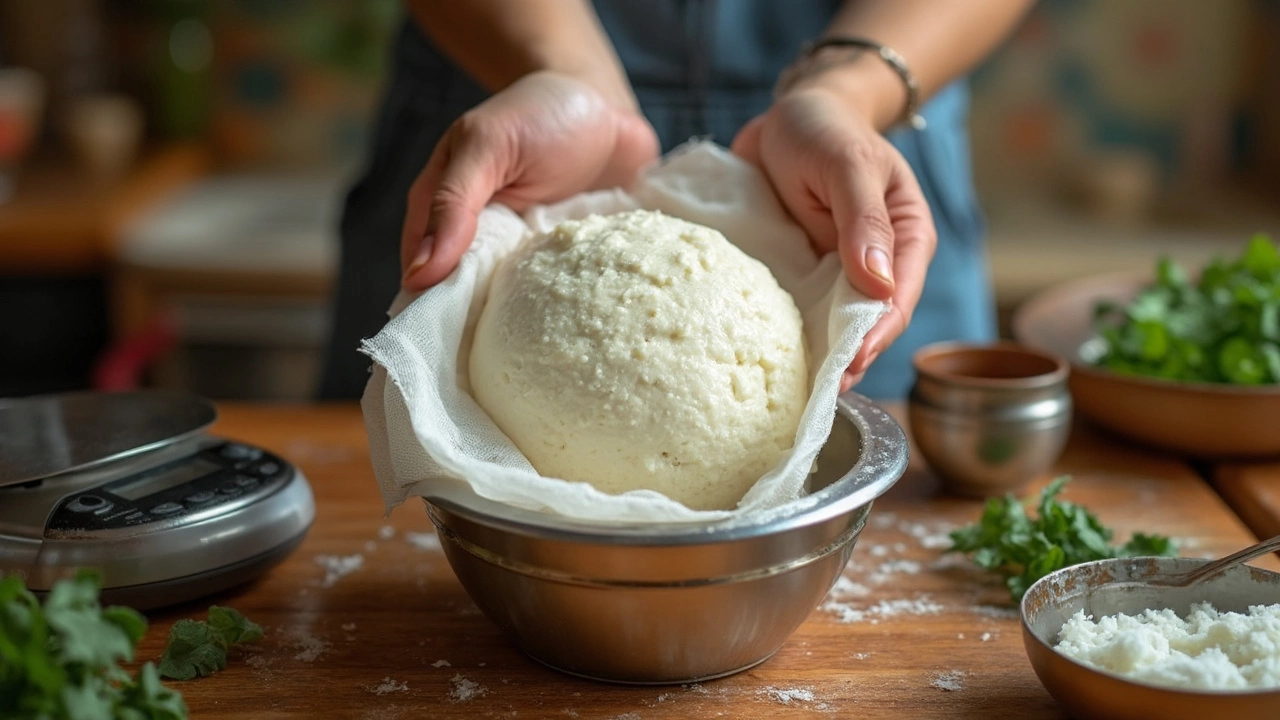
- How You Strain: The longer you let the curds hang, the firmer (and drier) your paneer will be, making it weigh less. If you’re after softer paneer, don’t overdain—give it about 30 minutes, no more.
Here’s a clear look at how each factor can change your yield, based on real kitchen results:
| Factor | Panes Yield (from 1 liter milk) |
|---|---|
| Full-fat cow's milk | 190-225g |
| Buffalo milk | 220-250g |
| Skimmed milk | 90-120g |
| Boiling too long | Up to 20% less |
| Overdraining | Up to 15% less |
Knowing these details helps you tweak your method and never be surprised by a tiny lump of paneer after all that effort.
Choosing the Right Milk for Best Results
If there’s one step that can really make or break your homemade paneer, it’s picking the right kind of milk. Not all milk is equal when it comes to yield, taste, or texture. For that creamy block you get at good Indian restaurants, you need to pay attention to fat content, freshness, and whether the milk is processed.
The gold standard for milk to paneer ratio is always full-fat, also called whole milk—think something with at least 3.5% fat. Skim or low-fat milk can leave you with dry, crumbly paneer that feels more like tofu than cheese. Buffalo milk gives you even more paneer (often up to 250g per liter) but might not be as easy to find everywhere.
Here’s how different types of milk stack up when it comes to paneer yield per liter:
| Type of Milk | Average Paneer Yield (per liter) | Key Notes |
|---|---|---|
| Full-fat cow’s milk | ~200g | Soft, rich, easy to find |
| Low-fat milk (2%) | 120g–150g | Drier texture, less creamy |
| Skim milk | 60g–100g | Not recommended for paneer |
| Buffalo milk | 220g–250g | High yield, creamy, harder to find |
One big mistake is using UHT (ultra-high temperature) or long-life milk. Sounds convenient, but it messes up the texture and makes the curds strange and rubbery. Fresh, pasteurized milk from the fridge section is a much better bet, especially if you want that classic soft paneer.
- Check the fat percentage on the label if you’re not sure. Aim for 3.5% or higher.
- If you can get local, unprocessed milk (sometimes called raw milk), that’s usually best. Just boil it well before using.
- Try mixing cow and buffalo milk if you can find both—this combo gives a nice balance.
So if you want the most paneer per batch and crave that melt-in-your-mouth texture, always start with whole, fresh milk. The better your milk, the better your cheese. Simple as that.
Common Mistakes to Avoid
It’s easy to mess up homemade paneer if you’re not careful with the process. Even small slip-ups can wreck the texture or give you way less paneer than you wanted. Let’s go through the errors most people make and find out how to dodge them.
- Boiling the milk too hard or too long: Milk should be heated just until it boils, then you add your acid. A rolling boil will make the curds tough or rubbery. Keep it gentle.
- Using ultra-pasteurized milk: This type won’t give you good curds at all; your milk to paneer ratio drops like a rock. Always pick regular full-fat milk for the best yield.
- Forgetting to stir: Once the milk starts to boil, stir every now and then, so it doesn’t sit and burn at the bottom.
- Adding acid too soon or too late: Timing is everything. Add lemon juice or vinegar when the milk is just about to boil. Wait too long and you risk watery paneer.
- Skipping the rinse: Always rinse your curds under cold water after straining. This keeps the paneer soft and washes out any tangy flavor that vinegar or lemon juice might leave.
- Squeezing too hard: Pressing the curds with all your might squeezes out moisture, but also makes the paneer dry and crumbly. Gentle pressure does the trick.
Here’s a quick table to help you spot and fix the mistakes:
| Mistake | What Happens | How to Fix It |
|---|---|---|
| Boiling milk too long | Rubbery, tough paneer | Take milk off heat once it boils |
| Using ultra-pasteurized milk | Poor curd formation, wasted milk | Use regular full-fat milk only |
| Not rinsing curds | Tangy or bitter paneer | Rinse right after straining |
| Squeezing too hard | Dry, crumbly texture | Light, even pressure instead |
The founder of a popular Delhi-based restaurant once shared,
"If your paneer doesn’t taste like milk, you probably boiled it too much or used the wrong kind of milk. Freshness and a light hand work best every time."That’s a simple rule I swear by. Stay mindful during each step, and your paneer will always turn out soft and tasty.
Tips for Getting More Paneer Per Batch
If you’re aiming for the most paneer from your milk, a few easy tweaks can make a huge difference. You don’t have to be a pro—just a bit of know-how goes a long way when it comes to squeezing out every last bit.
- Milk to paneer ratio is super important. Always pick whole milk (full-fat milk). Skim or low-fat milk just doesn’t cut it if you want a good yield. Buffalo milk, if you can find it, will actually give you more paneer than cow’s milk because it’s creamier.
- Heat your milk slowly, and stir it often. This prevents sticking and burning. If the milk burns—even a little—you'll taste it in the paneer.
- Only add the acidic agent (lemon juice or vinegar) once the milk comes to a full boil. Turn off the heat before adding it. This gives softer, chunkier curds, and you’ll lose less in the whey.
- Don’t go overboard with lemon juice or vinegar. Too much acid can make the curds hard and chalky, and you’ll end up with less cheese. Just enough to split the milk is perfect.
- Once curds form and separate from the greenish whey, pour everything into a muslin cloth or a clean kitchen towel. Be gentle. Don’t press or squeeze too hard—the goal is to drain, not dry the paneer out completely.
- Save the whey. This liquid is full of protein and nutrients. Use it in kneading dough or in soups instead of throwing it away. It’s not just about more paneer, but getting the most out of your milk.
Believe it or not, fresh milk makes the biggest difference. Powdered milk or milk that’s nearly expired will not yield as much. Try a small batch first, and once you see which technique gets you the most, scale up from there. It’s actually pretty satisfying to see just how much fresh, homemade paneer you can create with just a little attention to detail.