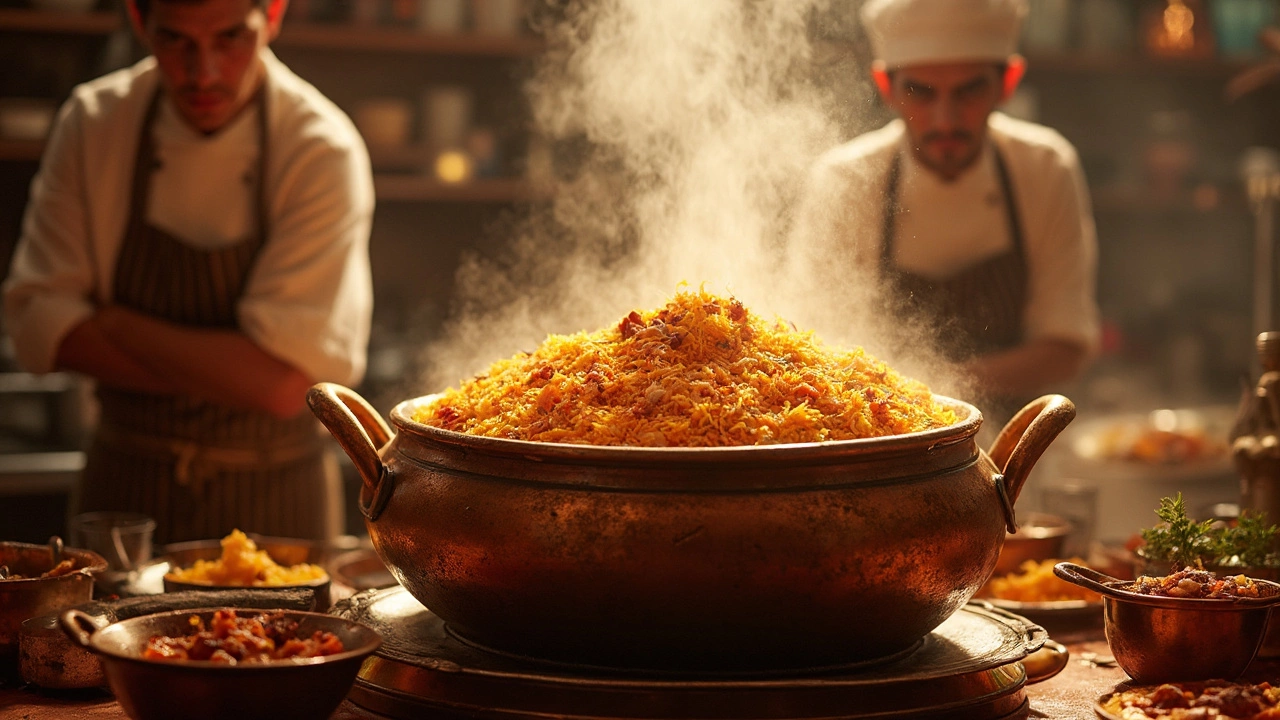
Ever made biryani at home and felt like it was missing that restaurant charm? You’re definitely not imagining things. Restaurant biryani gets its signature taste because of a few moves that most home cooks miss.
First off, the type of rice isn’t just about basmati—it’s about how it’s soaked, parboiled, and even what brand they pick. Chefs in busy kitchens are picky about rice, and they use huge quantities just right for even cooking. At home, it can be easy to overcook or under-season the grains.
Another thing? The way restaurants layer and season their biryani plays a big role. They don’t chuck everything in a pot and hope for the best. There’s a method to the madness: marinating, cooking meats and veggies separately, and then bringing it all together with careful layering. Plus, they’re not shy with the ghee and fried onions, both of which boost flavor in a big way.
If you want to get close to that iconic restaurant biryani at home, start by paying a little extra attention to your rice and the order you do things. Those are the keys most people miss. And don’t worry—I’m about to unpack the rest of the secrets so you can try them yourself.
- Rice: More Than Just a Base
- Spices: Timing and Technique
- The Magic of Dum Cooking
- Restaurant Tricks You Can Try at Home
Rice: More Than Just a Base
No matter how great your meat or veggies are, the rice can make or break your biryani. Restaurants don’t just use any old rice. They stake everything on premium aged basmati rice, which gives those long, separate grains and that unmistakable aroma. Did you know that some restaurants even pay double for rice that’s aged at least two years because it absorbs flavors better and never gets sticky?
The soaking and parboiling steps are not negotiable. Skipping these is one of the most common mistakes people make at home. Here's how restaurant kitchens usually handle it:
- Soak the rice for 30 minutes—it keeps grains from snapping during cooking.
- Salt the boiling water heavily, a bit like pasta water. This step seasons the rice itself and not just the surface.
- Parboil the rice, so it’s about 70% cooked before layering. If you go fully cooked, you risk mushy biryani after dum (steaming).
Restaurant kitchens often cook massive amounts at once. That means they have huge pots with steady heat, so rice cooks more evenly. At home, if your pot is too small or you crowd the rice, you end up with clumpy or broken grains.
Here's a quick look at why restaurant rice stands out:
| Factor | Restaurant Method | Typical Home Method |
|---|---|---|
| Type | Aged basmati (2+ years) | Any basmati, sometimes fresh |
| Soaking | Always soaked 30-60 minutes | Often skipped |
| Parboiling | 70% cooked, salted water | Sometimes fully cooked, less salt |
| Batch Size | Large pots for even heat | Smaller pots, uneven cooking |
Want to nail that restaurant vibe at home? Use high-quality aged basmati, soak it for at least half an hour, and always parboil with lots of salt. These tiny tweaks flip the outcome from basic to something way closer to what you taste when you order restaurant biryani.
Spices: Timing and Technique
Walk into any restaurant kitchen during biryani prep, and you’ll smell the difference before you taste it. Chefs never just toss in all the spices at once; how and when they go in matters a lot. The order of cooking changes everything about the final taste.
The chef’s trick is in blooming spices properly. That means heating whole spices like bay leaf, cinnamon, cardamom, and cloves in hot ghee or oil first. Letting them sizzle for just a minute or two makes a huge difference—this “tempering” wakes up all those locked flavors and oils. Once the whole spices get fragrant, chefs toss in onions, garlic, and ginger. Ground spices like turmeric, red chili powder, and coriander go in later, so they don’t burn or turn bitter. Every step is watched closely. If you dump them all together or cook them too long, you lose flavor and aroma fast.
Here’s what Indian restaurant kitchens often do, step by step:
- Heat ghee or oil—never skip this, since dry-roasting won’t unlock the full punch of your spice mix.
- Throw in whole spices (think bay leaf, star anise, cardamom pods, cinnamon sticks) first for 1–2 minutes.
- Add sliced onions and sauté until golden brown—that sweetness is key.
- Add ginger-garlic paste, frying out the raw smell.
- Mix in ground spices (turmeric, chili powder, garam masala) quickly, stirring for just 20–40 seconds.
Restaurants almost always grind their own garam masala fresh. This isn’t just to be fancy—pre-ground stuff loses its kick quickly, so “fresh” really does equal more flavor.
If you want to nail the restaurant biryani flavor at home, avoid shortcuts here. Try to use fresh, whole spices and learn the steps above. Even small tweaks in timing totally change the taste.
Just to break it down, here’s a quick summary comparing homemade and restaurant biryani approaches:
| Step | Homemade Biryani | Restaurant Biryani |
|---|---|---|
| Spice Quality | Pre-ground, sometimes old | Freshly ground, whole spices preferred |
| Order of Adding | All at once, not timed | Sequenced for flavor layering |
| Fat Used | Oil or a little ghee | More ghee/oil for better blooming |
| Cooking Time | Less, often rushed | Patient, step-by-step |
This process is why the spices in restaurant biryani pop so much on your tongue—and why it’s tough to get the same result if you rush or skip steps. Tiny changes in spice technique add up fast, so don’t be afraid to tweak your method and taste as you go.
The Magic of Dum Cooking
Let’s talk about what really sets restaurant biryani apart: dum cooking. This isn’t just a fancy word—it's about how everything comes together, and it’s a total game-changer for flavor.
Dum means slow-cooking food in a sealed pot. The idea is simple: all the layers—rice, meat, spices—are stacked in a heavy-bottomed pan, then the pot is sealed tight, classically with dough or even a heavy lid. Sometimes chefs even use foil for that extra seal. This locking in of steam makes sure every grain and chunk soaks up maximum taste.
Restaurants nail this method because their giant pots hold heat like champs, and chefs control temperature just right. Home kitchens can come close, though. Get your heaviest pan or Dutch oven. Once layered, cover the lid tightly—use a clean kitchen towel under the lid or seal with dough for best results. Cook on super low. If you don’t have a wide flame, use a tava (flat iron griddle) under the pot to diffuse the heat.
Dum isn’t about speed. Restaurants can let biryani steam for 30–45 minutes or longer. That’s when magic happens—the flavors fuse, and you get that restaurant-style aroma when you lift the lid.
- Try this at home: After stacking your layers, cook on low for at least 30 minutes.
- If you’re nervous about burning, place a heavy skillet (tava) between your pot and the burner.
- Check for aroma and steam escaping—don’t open the lid unless you smell that classic biryani hit.
Here’s what dum cooking really does compared to ordinary methods:
| Method | Average Cook Time | Flavor Depth | Grain Texture |
|---|---|---|---|
| Dum Cooking | 30–45 min | Deep, fused | Distinct, fluffy |
| Quick/One-pot | 15–20 min | Basic, mild | Often sticky |
The restaurant biryani you crave gets its wow-factor because dum cooking gives those subtle, intense layers of taste. Even if you skip other steps, don’t miss this one if you want that real-deal flavor.
Restaurant Tricks You Can Try at Home
Want your biryani to taste like it’s straight out of a busy kitchen? The good news: most tricks used by restaurants are doable in your own kitchen. You just need to know what to switch up and why it matters.
Start with the rice. Restaurants usually use top-quality basmati, soaked for at least 30 minutes. They parboil it in salted water with a little oil, so the grains stay separate and fluffy after cooking. At home, skip the urge to just boil until soft. You want it only about 70% cooked before layering.
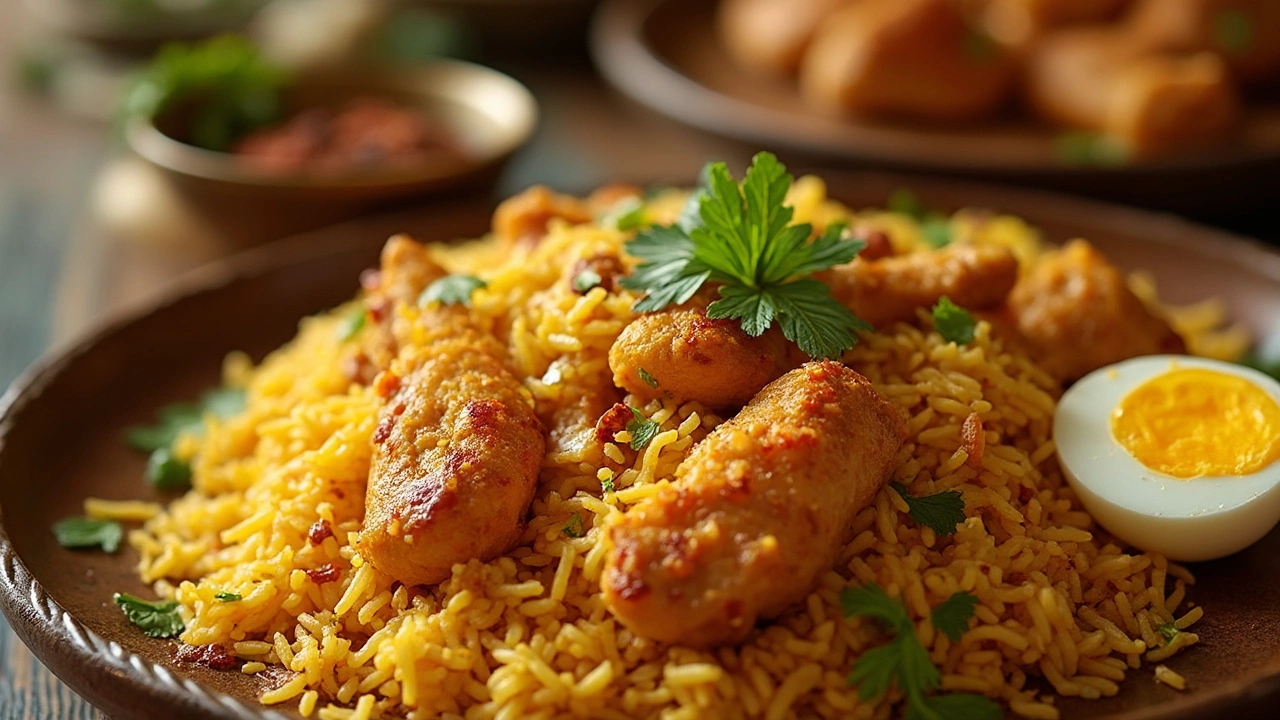
When it comes to seasoning, don’t hold back on the aromatics. Throw in whole spices—bay leaves, star anise, cardamom, cloves—right into the boiling rice. These give that instant whiff of restaurant biryani as soon as you open the lid. For even bigger flavor, blend some fried onions into your marinade for the meat. Most restaurant chefs use at least double the amount of fried onions home cooks do. Pro tip: make your own instead of store-bought for extra crunch and sweetness.
Dum cooking (the classic steam method) is non-negotiable. Even if you don’t have a heavy-bottomed pot or traditional dough to seal the lid, you can use a clean kitchen towel under the lid to trap the steam. Keep it on a very low flame so everything gets cooked with its own steam and juices. Don’t peek before at least 20 minutes—trust the process.
If you want that appetizing color, try using a bit of saffron soaked in warm milk, or food coloring. Restaurants usually drizzle this in stripes over the top layer before sealing. The random patches of color are classic and purely for looks, so don’t worry if you skip this step for daily meals.
Some extras to take things over the top:
- Use a mix of ghee and oil for frying your onions and cooking the rice. Ghee adds aroma, oil stops things from burning.
- Add a splash of rose water or kewra water to the rice layers right before sealing. This gives the signature floral note most restaurant biryanis have.
- Grind your own biryani masala when possible—it’s fresher and stronger than store-bought mixes.
- Layer chopped herbs (mostly cilantro and mint) between rice and meat. Don’t just throw them on top at the end.
Here’s a quick comparison of restaurant vs. home biryani tricks in numbers:
| Step | Restaurant Method | Typical Home Method |
|---|---|---|
| Rice Soaking Time | 30-45 mins | 10-15 mins or skipped |
| Fried Onions | 2-3 times more, homemade | Small amount or store-bought |
| Dum Cooking | Always used, 20-25 mins | Sometimes skipped, often just mixed and boiled |
| Spices | Whole & fresh-ground | Sometimes just pre-mixed powders |
| Herb Layering | In every layer | Usually just garnished |
Following even just a couple of these tips can bring your homemade biryani way closer to that mouthwatering restaurant flavor. Don’t be afraid to go the extra mile—it always pays off in taste.